simple variations with weave alterations
First Weave Variations
By now my students understand how the first weaves of the Inuit, Navaho, and Klamath Nets differ. Each begins with the thumb retrieving a string, but the identity of that string (near little or far index), and the path taken by the thumb along the way (over index loop or down through it), can differ. i therefore encourage my students to explore alternative string/path combinations.
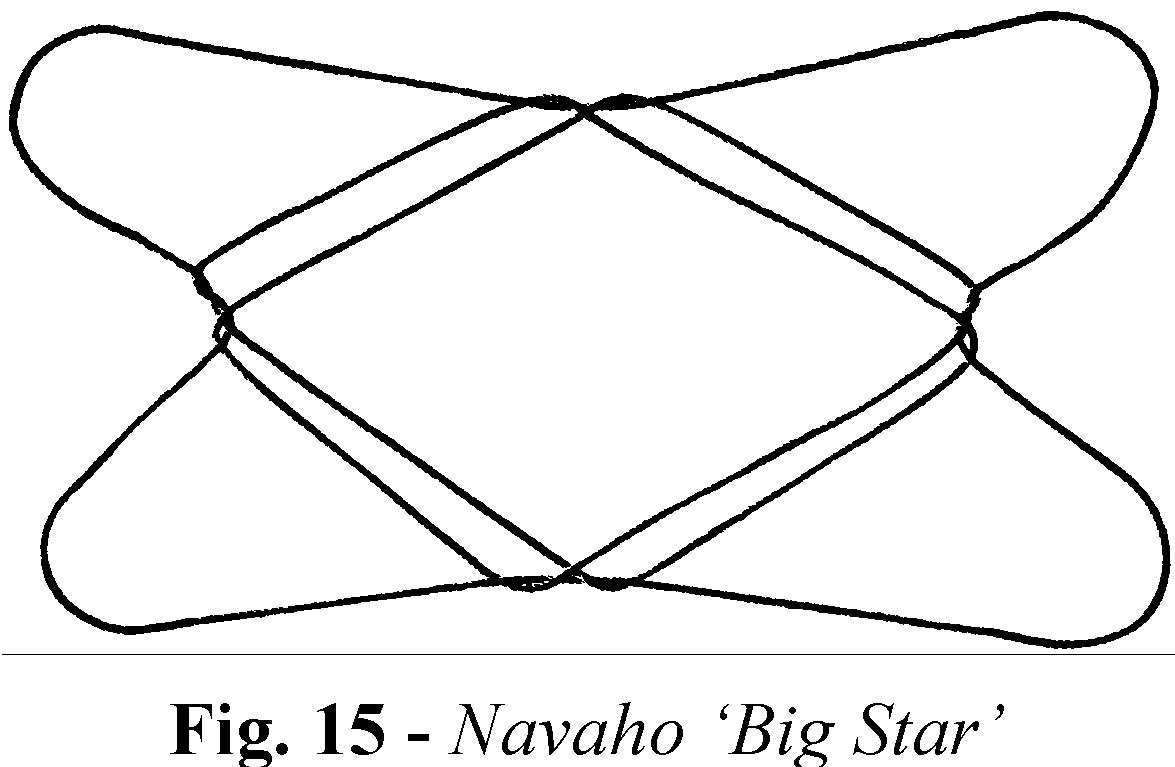
There are, in fact, four different strings the thumb can retrieve (near index, far index, near little finger, far little finger) and depending on which string is selected, up to nine different pathways (i.e., when retrieving the far little finger string, the thumb can go over three strings, or under three strings, or over two and under one, etc.). For example, make the Navaho Net, but during the first weave (N-1) pass the thumb down through the index loop, under the near little finger string, and pick up the far little finger string. The result is a pleasing double-walled diamond figure (fig. 15) known as ‘Big Star’ among the Navaho Indians (Jayne 1906:64).
If you make ‘Big Star’ with a modified loom, you get a very pleasing figure which I have adopted as my logo. The modification creates a star with an octagonal hole in the center:
Murphy’s Logo
- Opening A
- Modify the loom as follows: rotate little finger loop +2/2; rotate thumb loop +2/2
- Alter the First Navaho Weave as follows: Pass each thumb over the near index string and under all other strings, pick up the far little finger string, and return.
- With each middle finger pick up the lower far thumb string and return. Drop thumb loops and extend. Now finish making the Navaho Net, starting with the Second Navaho Weave (N-2). The result is ‘Murphy’s Logo’ (fig. 16; see also fig. 49).
Second Weave Variations
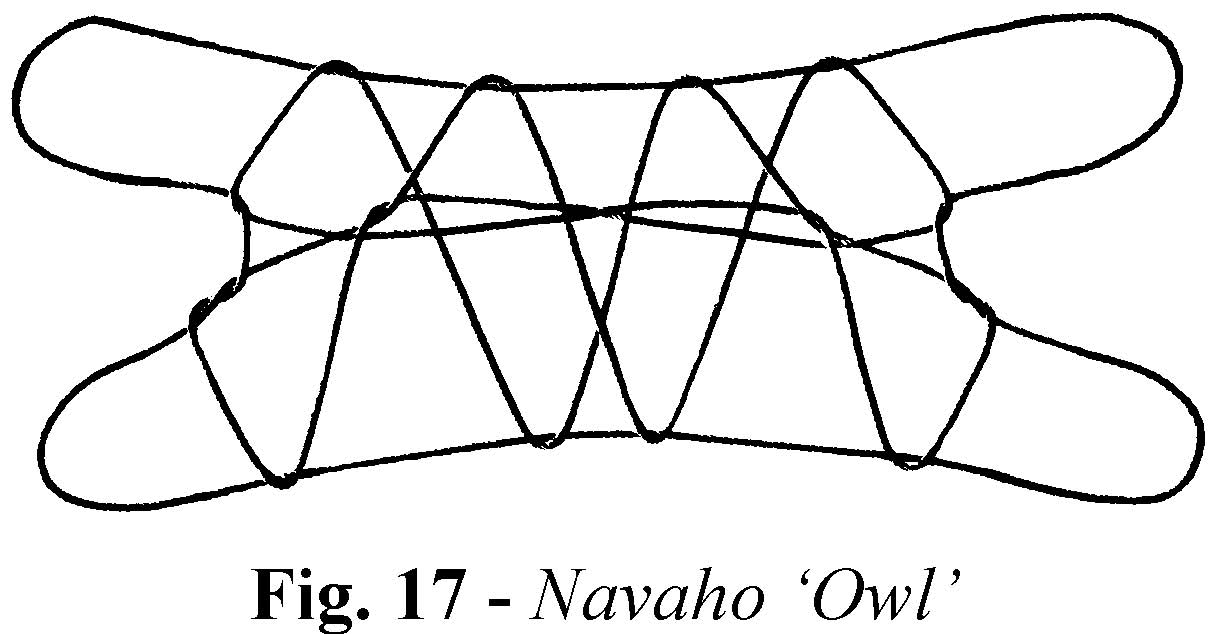
The second weave for each of the three North American Nets is the same: thumb goes down through (lower) index loop and retrieves far little finger string. Variations here are limited. If the far little finger string (a transverse string) is not retrieved, the design will collapse when extended since one of the frame lines will be missing. However the path taken by the thumb prior to retrieving the far little finger string can be altered. For example, make the Navaho Net, but during the second weave (N-2) pass the thumb up through the index loop rather than down through it prior to retrieving the far little finger string. The result is a pleasing design (fig. 17) known as ‘A Third Owl’ among the Navaho (Jayne 1906:55-56).
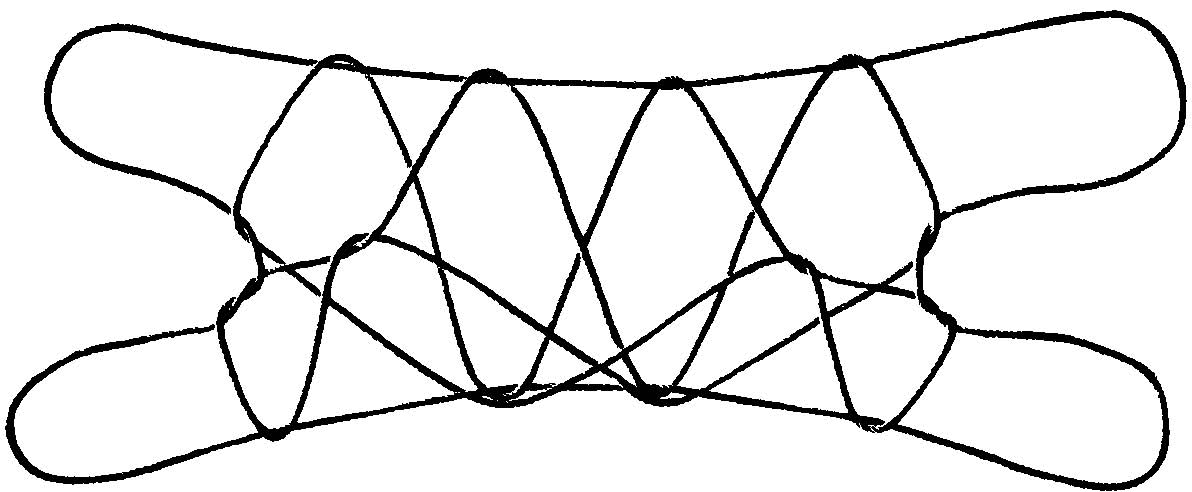
Or, make the Navaho Net, but during the second weave pass the thumb over the index loop and under the middle and little finger loops prior to retrieving the far little finger string. The result is shown in fig. 18. This variation is used in mythree-dimensional ‘Navaho Release’ fig-ures (see page 193).
REPETITIVE WEAVING AND HYBRID NETS
In addition to allowing one to examine the heart of each net, the Continuation Move described on page 173 serves two other purposes: it facilitates the introduction of richness by allowing repetitive weaving (as in the Ten Men system, see Murphy 1998:165), and it facilitates switching from one net sequence to another (i.e., it allows the formation of hybrid nets)
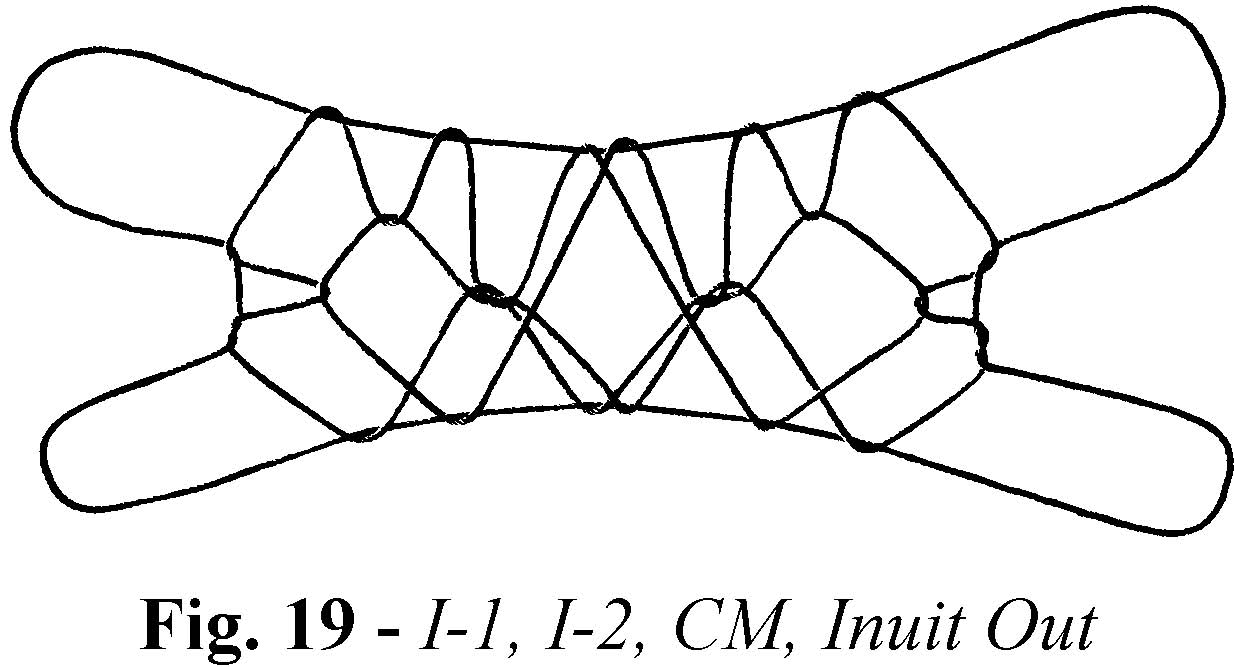
First, let’s examine its use in adding richness. Complete the first and second weave of the Inuit Net (I-1 and I-2), apply the Continuation Move, then make the Inuit Net from the beginning as if you had Opening A on your hands (i call this Inuit Out). The result is shown in fig. 19 (i particularly like the design motifs on either side of the central diamond — you’ll find them in many of the complex variations i present later on).
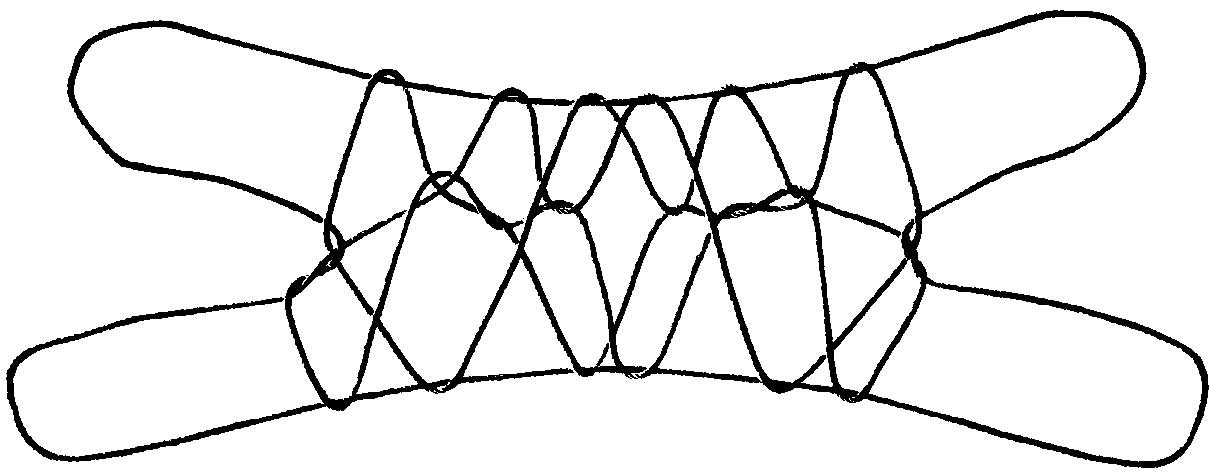
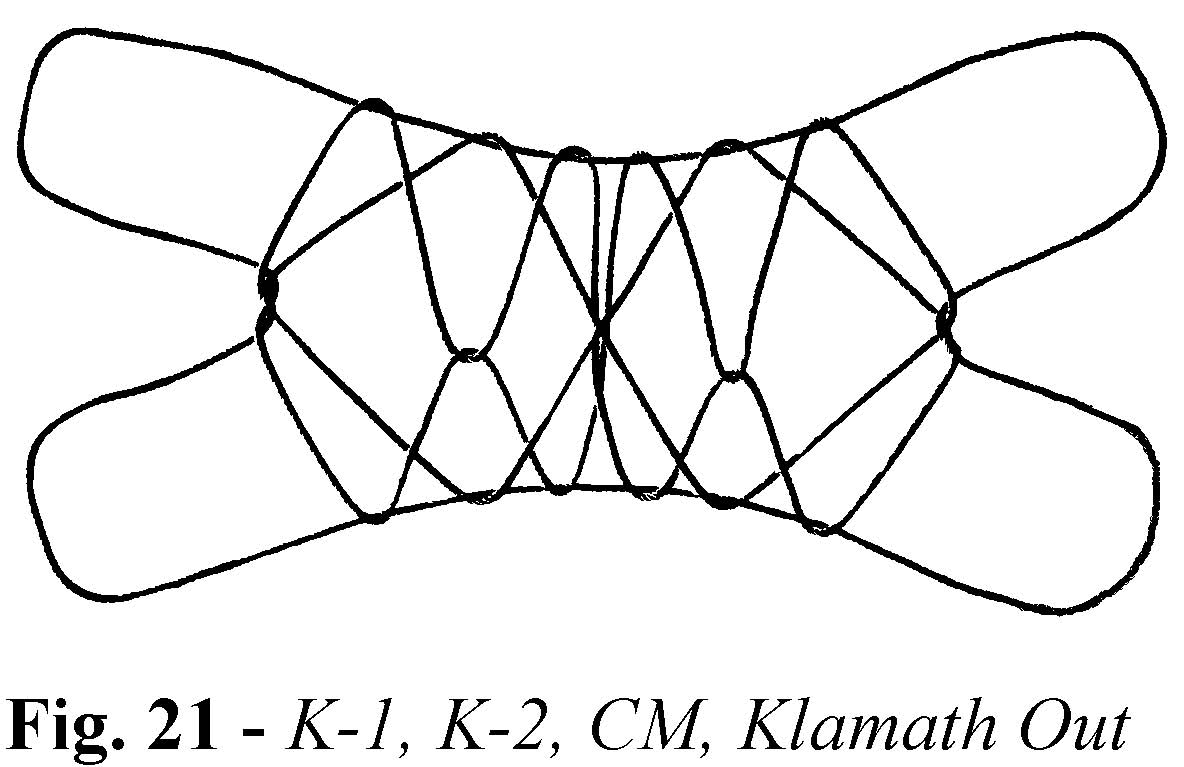
You can likewise add richness to the Navaho Net by completing the first and second weaves of the Navaho Net (N-1 and N-2), applying the Continuation Move, then making the Navaho Net from the beginning (fig. 20), and the same technique can be used to add richness to the Klamath Net (fig. 21). Obviously you are not limited to one repetition of the weaving sequence: Any number of continuation moves can be introduced provided your string is long enough!.
To switch from one net to another in mid-course, complete the first two weaves of any given net, apply the Continuation Move to obtain an Opening A-like configuration, then shift the loops around until you achieve an arrangement that allows you to Fix the Bottom and Clean the Top. Recall that for the Inuit Net, the upper near index and far little finger strings must be transverse; for the Navaho Net the lower near thumb and upper far index string must be transverse; and for the Klamath Net the near thumb and far little finger strings must be transverse. The following list should assist you. Note that for each net there are two ways to achieve the desired transverse string arrangement.
Switching to the Navaho Net
Method 1: Apply the Continuation Move, transfer the little finger loop to the top of the index finger, and with each thumb pick up the upper near index string. You are now ready to Fix the Bottom and Clean the Top using the Navaho method.
Method 2: Apply the Continuation Move, transfer the thumb loop to the top of the index (inserting the index from above), pass the thumb under the index loops and pick up the far little finger string, drop the little finger loop, and with each thumb pick up the upper near index string. You are now ready to Fix the Bottom and Clean the Top using the Navaho method.
Switching to the Inuit Net
Method 1: Apply the Continuation Move, transfer the thumb loop to the top of the index, withdraw the little finger from its loop, then reinsert the ring and little fingers into this loop from above and close them to the palm. You are now ready to Fix the Bottom and Clean the Top using the Inuit method.
Method 2: Apply the Continuation Move, transfer the little finger loop to the top of the index, inserting the index from above, transfer the thumb loop to the ring-little fingers, inserting them from below and closing them to the palm. You are now ready to Fix the Bottom and Clean the Top using the Inuit method.
Switching to the Klamath Net
Method 1: Transfer the little finger loop to the top of the index, inserting the index from above; transfer the thumb loop to the three lesser fingers (i.e., pass them under the index loops and insert them, from below into the thumb loop, close them over the near thumb string and withdraw the thumb), transfer the upper index loop to the thumb. You are now ready to Fix the Bottom and Clean the Top using the Klamath method.
Method 2: Withdraw the little finger from its loop, then reinsert the three lesser fingers into this loop from above and close them to the palm. You are now ready to Fix the Bottom and Clean the Top using the Klamath method.
things to consider
note that you should be becoming more adept at considering new ways of using the methods you are now practicing. later lessons will add many more to your repertoire.
